Contact Form 7 is a very popular plugin for WordPress websites, with over 5 million downloads. However, it doesn’t look great out of the box and often needs some custom styling to make it visually appealing. While some themes come with built-in styles for Contact Form 7, others, like Underscores or Sage, may require you to add your own CSS to make the form look good. I’ll show you how to style Contact Form 7 and provide some CSS code that you can easily use on your website.
Where we put CSS in WordPress for adding style on CF7?
To style Contact Form 7 on your WordPress website, you can add custom CSS code in various ways. One option is to directly edit the theme’s style.css file or use the “Additional CSS” area in the theme customization section. Some themes, like Astra, offer this option even in their free version.
However, the easiest and safest method, in my opinion, is to use a plugin called “wpcode lite” This plugin allows you to add custom CSS code without modifying theme files directly.
Now, let’s dive into the CSS code examples. Before using CSS style how was it look this.

Read also, How to add sticky Social Media bar in WordPress Websites / What is meta tags and how to add on WordPress Websites / Automatic Table of Contents in WordPress Website without plugin.
First, Let’s start staling on Background of CF7
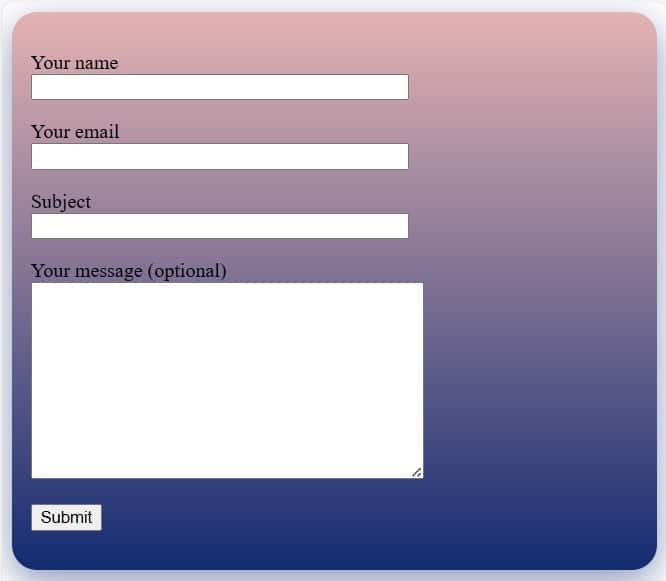
Let’s begin styling the background of Contact Form 7 (CF7). We’ll add color, padding, margin, border radius, background shadow, and a gradient background color.
To achieve this, you can use the following CSS code:
.page-content {
    background: linear-gradient(to bottom, #e4b3b3, #132B71); /* Replace these colors with your desired gradient */
    padding: 15px; /* Adjust padding as needed */
    border-radius: 20px; /* Add rounded corners */
    box-shadow: 0px 10px 30px rgba(19, 43, 113, 0.5); /* Add shadow effect */
    border: 5px solid #455030;
 }
In this CSS code:
.wpcf7-formselects the container wrapping the Contact Form 7 form.paddingadds space inside the container.marginadds space outside the container.border-radiusrounds the corners of the container.box-shadowadds a shadow effect around the container.backgroundapplies a gradient background color to the container.borderadding border on CF7 container.
Adjust the values according to your preferences. Add this CSS to your WordPress theme’s custom CSS or use a custom CSS plugin to apply the styles to your site. This will style the background of your Contact Form 7 with padding, margin, border radius, background shadow, and a gradient background color.
Second, Customizing input field
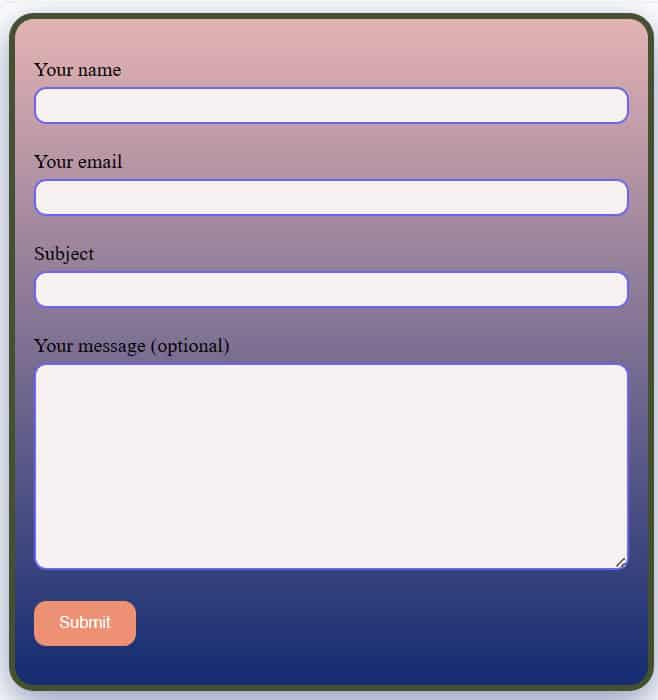
Next, let’s customize the input fields of Contact Form 7 (CF7). We’ll add border, margin, radius, width, padding, and background color to the input box.
To achieve this, you can use the following CSS code:
.wpcf7 input[type="text"],
 .wpcf7 input[type="email"],
 .wpcf7 input[type="tel"],
 .wpcf7 textarea {
     width: 100%;
     padding: 5px;
     margin-bottom: 5px;
     margin-top: 5px;
     border: 2px solid hsl(241, 83%, 67%);
     border-radius: 10px;
     box-sizing: border-box;
    background-color: hsl(0, 26%, 96%);
 }
In this CSS code:
.wpcf7 input[type="text"], .wpcf7 input[type="email"], .wpcf7 input[type="tel"], .wpcf7 textareaselects the input fields and text areas in Contact Form 7.widthsets the width of the input fields to 100% of their container.paddingadds space inside the input fields.marginadds space around the input fields.borderadds a 1px solid border around the input fields.border-radiusrounds the corners of the input fields.box-sizing: border-box;ensures that padding and border are included in the width and height of the input fields.background-colorsets the background color of the input fields.
Adjust the values according to your preferences. Add this CSS to your WordPress theme’s custom CSS or use a custom CSS plugin to apply the styles to your site. This will customize the input fields of your Contact Form 7 with border, margin, radius, width, padding, and background color.
Third, Customizing button
To customize the submit button of Contact Form 7 (CF7), including background color, border, padding, border radius, cursor, and alignment, you can use the following CSS code:
To achieve this, you can use the following CSS code:
.wpcf7 input[type="submit"] {
    background-color: #ed9074;
    color: #fff;
    border: none;
    padding: 10px 20px;
    border-radius: 10px;
    cursor: pointer;
    font-style: italic;
}


.wpcf7 input[type="submit"]:hover {
    background-color: #0056b3;
}
In this CSS code:
.wpcf7 input[type="submit"]selects the submit button of Contact Form 7.background-colorsets the background color of the button.colorsets the text color of the button.borderadds a border around the button.paddingadds space inside the button.border-radiusrounds the corners of the button.cursor: pointer;changes the cursor to a pointer when hovering over the button.text-align: center;aligns the text in the center of the button.display: block;makes the button a block element to control its width.margin: 0 auto;centers the button horizontally.width: fit-content;adjusts the width of the button based on its content.
Adjust the values according to your preferences. Add this CSS to your WordPress theme’s custom CSS or use a custom CSS plugin to apply the styles to your site. This will customize the submit button of your Contact Form 7 with background color, border, padding, border radius, cursor, and alignment. Additionally, it changes the background color and border color on hover.
Fourth, Other remaining CSS design for CF7
To add styles to the remaining elements of Contact Form 7 (CF7), including text color and size for labels, and styles for error and success messages, you can use the following CSS code:
To achieve this, you can use the following CSS code:
.wpcf7 label{
    color: #FFFFFF; /* Change the color as needed */
	display: block;
        margin-bottom: 5px;
        font-style: italic;
 }

 .wpcf7 .wpcf7-response-output.wpcf7-validation-errors {
    color: black;
    font-size: 14px;
}


.wpcf7 .wpcf7-response-output.wpcf7-mail-sent-ok {
    color: green;
    font-size: 14px;
}
In this CSS code:
.wpcf7 labelselects the labels within the Contact Form 7 form and applies styles such as color and font size..wpcf7 .wpcf7-response-output.wpcf7-validation-errorsselects the error messages displayed when validation fails and applies styles such as color and font size..wpcf7 .wpcf7-response-output.wpcf7-mail-sent-okselects the success message displayed when the email is successfully sent and applies styles such as color and font size.
Adjust the values according to your preferences. Add this CSS to your WordPress theme’s custom CSS or use a custom CSS plugin to apply the styles to your site. This will customize the labels, error messages, and success messages of your Contact Form 7 form with the specified styles.
Finally, Final CSS Adding CSS on WordPress
If you want to add the final CSS to your WordPress website using the “Additional CSS” section under “Appearance” > “Customize”, here are the steps:
- Log in to your WordPress dashboard.
- Go to “Appearance” > “Customize”.
- In the customizer, look for the “Additional CSS” option. It might be located at the bottom of the menu.
- Click on “Additional CSS” to open the CSS editor.
- Paste the provided CSS code into the editor.
- Review the CSS to ensure it matches your desired styling preferences.
- Click on the “Publish” button to save your changes.
.page-content {
    background: linear-gradient(to bottom, #e4b3b3, #132B71); /* Replace these colors with your desired gradient */
    padding: 15px; /* Adjust padding as needed */
    border-radius: 20px; /* Add rounded corners */
    box-shadow: 0px 10px 30px rgba(19, 43, 113, 0.5); /* Add shadow effect */
    border: 5px solid #455030;
}
 /* Style input fields */
 .wpcf7 input[type="text"],
 .wpcf7 input[type="email"],
 .wpcf7 input[type="tel"],
 .wpcf7 textarea {
     width: 100%;
     padding: 5px;
     margin-bottom: 5px;
     margin-top: 5px;
     border: 2px solid hsl(241, 83%, 67%);
     border-radius: 10px;
     box-sizing: border-box;
    background-color: hsl(0, 26%, 96%);
 }

 /* Style submit button */
 .wpcf7 input[type="submit"] {
    background-color: #ed9074;
    color: #fff;
    border: none;
    padding: 10px 20px;
    border-radius: 10px;
    cursor: pointer;
    font-style: italic;
}

/* Style submit button on hover */
.wpcf7 input[type="submit"]:hover {
    background-color: #0056b3;
}
.wpcf7 label{
    color: #FFFFFF; /* Change the color as needed */
	display: block;
    margin-bottom: 5px;
    font-style: italic;
 }
 /* Style error messages */
 .wpcf7 .wpcf7-response-output.wpcf7-validation-errors {
    color: black;
    font-size: 14px;
}

/* Style success message */
.wpcf7 .wpcf7-response-output.wpcf7-mail-sent-ok {
    color: green;
    font-size: 14px;
}
Alternatively, if you prefer to use a plugin like WPCode Lite to add custom CSS, you can follow these steps:
- Log in to your WordPress dashboard.
- Go to “Plugins” > “Add New”.
- Search for “WPCode Lite” in the search bar.
- Install and activate the plugin.
- Once activated, go to “WPCode Lite” from the left sidebar menu.
- Paste the provided CSS code into the editor.
- Review the CSS to ensure it matches your desired styling preferences.
- Click on the “Save Changes” button to save your CSS.
Either method will allow you to add custom CSS to your WordPress website, ensuring that your Contact Form 7 (CF7) is styled according to your preferences.
Final Output
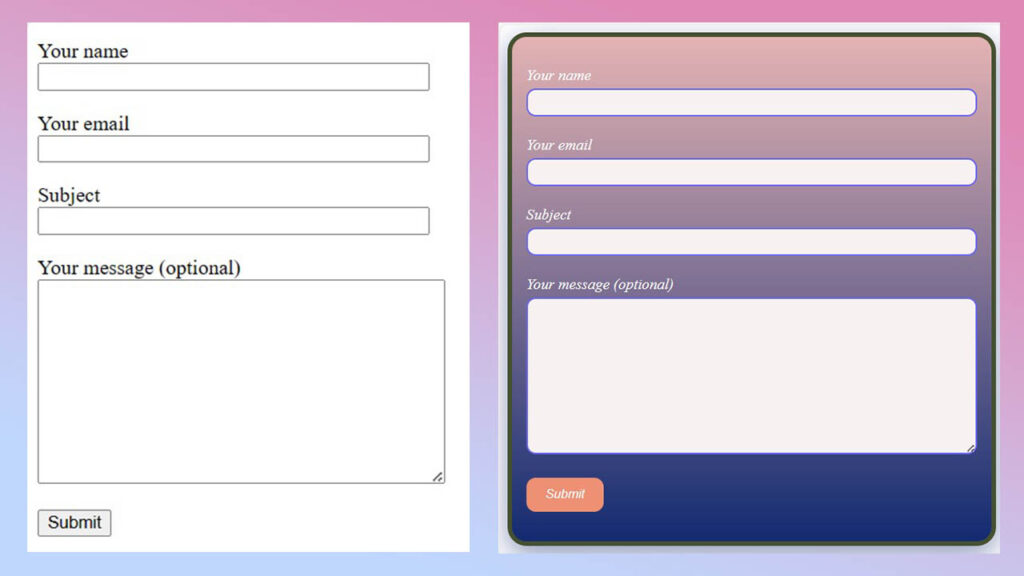
Feel free to adjust the values such as colors, font sizes, border radius, and other properties to match your desired styling preferences. You can use an online tool for real-time preview and experimentation with different values.
Guide Video
Warping up
In conclusion, styling Contact Form 7 (CF7) can greatly enhance its appearance and user experience on your WordPress website. By adding custom CSS, you can personalize the look of your forms to match your site’s design and branding. From adjusting input field styles to customizing button appearance and error/success messages, there are various ways to make your CF7 forms visually appealing and user-friendly. Don’t hesitate to experiment with different colors, font sizes, and other properties to create a unique and attractive contact form that perfectly fits your website’s aesthetic. With the right styling, your CF7 forms will not only capture users’ attention but also encourage them to engage and interact with your site more effectively.
Leave a Reply